Laptop Desk Stand Comparison: Center-Display Ergonomics
By Aisha Chen • 8th Apr
A laptop desk stand is no longer a luxury; it is foundational to professional posture and camera-ready presence. Whether you're building a triple monitor workstation or simply lifting your 13-inch MacBook above desk level, the wrong stand choice cascades: neck strain compounds across eight-hour days, wobble undermines your credibility on video calls, and slow setup burns the minutes you don't have. This guide cuts through the lookalike options and arms you with a measurement-based framework to choose the stand that fits your body, workspace, and workflow (not the marketing copy).
Why Laptop Desk Stands Matter: Beyond the Cliche
The case for elevation is anatomical, not philosophical. When your screen sits flat on your desk, your eyes naturally drift downward, pulling your cervical spine into chronic flexion. Over weeks, this compounds into the shoulder and neck strain that plagues knowledge workers[1]. Raising your laptop to eye level restores neutral spine alignment, but only if the stand offers enough adjustability to match your specific height, desk depth, and monitor size. To dial in exact measurements, use our laptop stand height calculator.
The gains are measurable: posture improves within days, video call framing shifts from unflattering up-the-nose angles to professional eye-level alignment, and your hands maintain neutral wrist extension when paired with an external keyboard. Beyond ergonomics, the psychological lift is real. A stand signals intentional workspace design rather than reactive desk chaos[1].
But here's what most guides miss: the stand is only half the system. Its value multiplies when paired with deliberate desk layout, cable management, and (if you're running multiple screens) thoughtful alignment of your visual field.
The Center-Display Principle: Why Your Laptop Becomes Primary
Many remote workers and creators now run multi-screen alignment techniques that position the laptop as the central reference point rather than an afterthought. For three-screen workflows, see our three-screen setup guide to align flanking monitors around a laptop-centered layout. This shift matters because:
- Visual field transition optimization means your most-used app (email, chat, IDE, editing suite) occupies central real estate where your eyes rest naturally, minimizing head rotation and neck strain.
- Flanking monitors handle secondary tasks - dashboards, reference windows, chat - without forcing the 20° rotations that tire your cervical spine over hours.
- When your laptop sits at true eye level, you've anchored the whole workstation: external monitors align above or beside it, keyboard and mouse follow, cable routing becomes logical instead of chaotic.
For a laptop as primary monitor in a three-screen ergonomics setup, this means your stand must offer:
- Height range that places the top third of your laptop screen at or slightly below eye level (typically 15-22 inches off the desk for seated work)[1].
- Tilt precision to angle the screen away from overhead glare and toward your sightline.
- Stability that doesn't shift when external peripherals tug on USB or HDMI ports.
- Thermal clearance so flanking monitors don't trap heat radiating from your lifted machine.
Key Specs That Separate Solid Stands from Disappointing Ones
Height and Tilt Range: Your Fit Window
Heights matter more than most reviews acknowledge. A stand offering 6-inch maximum lift works beautifully for a petite designer at a shallow desk but leaves a 6'3" engineer's neck in flexion. Conversely, 20+ inches of lift sounds luxe until you realize it makes your laptop wobble and forces you to tilt your head back to see the screen[1][3].
Look for stands specifying:
- Minimum and maximum height (e.g., 2.5 to 8 inches off the desk).
- Tilt adjustment granularity: fixed angles (like eight groove positions) versus continuous adjustment[1].
- Weight rating: ensure it exceeds your laptop weight by at least 2-3 pounds (heavier 15-17 inch machines cause sag over time).
A practical rule: your comfort range is the window where your screen can reach eye level and your elbows stay close to your ribs when typing with an external keyboard[1]. Stands that force you outside this window create compensatory strain elsewhere.
Stability Under Load: The Wobble Test
Wobble signals compromised components or poor weight distribution. When you type on an elevated laptop (especially a heavier machine), the stand must absorb keystroke vibration without creep (gradual downward shift) or bounce. Budget stands often fail here; their hinges loosen after weeks of micro-movement[1].
Risk-reduction tip: test stability by pressing firmly on one corner of the laptop while it's seated on the stand. The stand should feel locked, not springy. If it flexes noticeably, return it. Wobble compounds into wrist and shoulder issues as you unconsciously brace against movement.
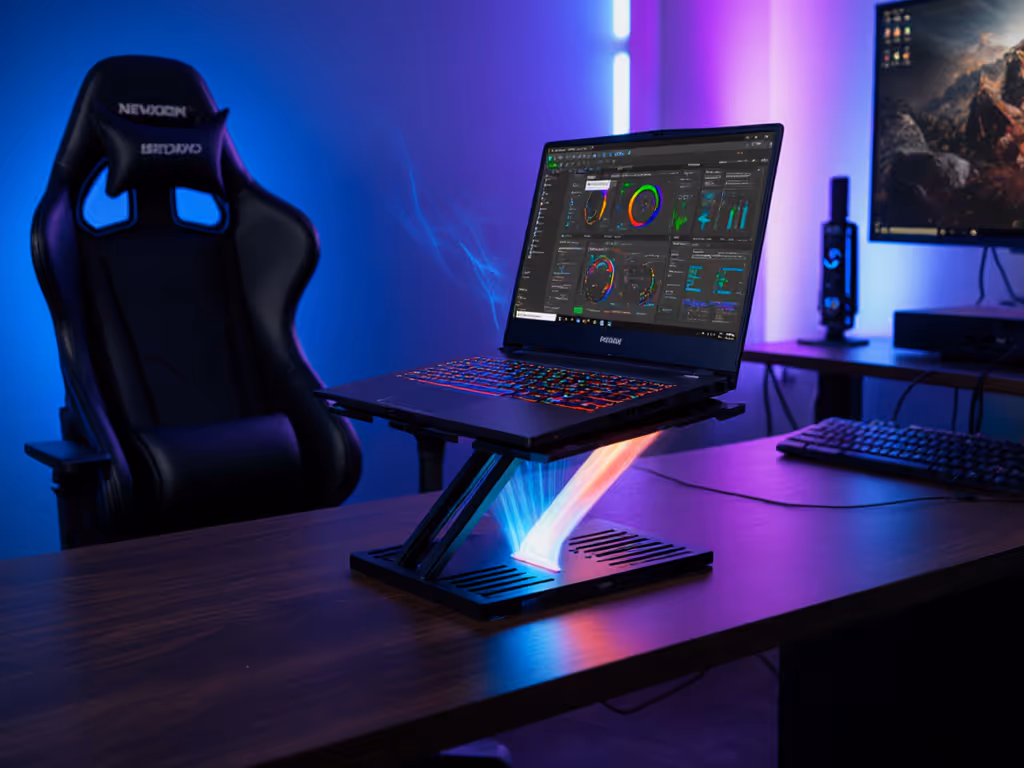
Cooling and Airflow: Thermal Headroom
Raised stands are meant to improve cooling by allowing underside airflow. However, stands with tight clamping, dense plastic bases, or closed-bottom designs can trap heat[1][5]. This matters acutely if you're rendering video, training models, or running CPU-intensive work during back-to-back calls: thermal throttling kills performance, and fan noise ruins your audio presence. Learn the science behind airflow and throttling in our laptop cooling thermodynamics guide.
Prefer stands with:
- Open or mesh undersides (aluminum frames, minimal base coverage).
- Sled or clip designs that contact only the edges of your laptop, leaving the underside completely exposed.
- Separation from your desk surface (at least 1-2 inches) to allow convection beneath the stand itself.
Packability vs. Permanence: A Time-Aware Split
This is where Aisha's real-world insight reshapes the decision tree.
If you're tethered to one desk (home office, permanent cubicle), invest in a heavier, adjustable stand with continuous height and tilt control. These typically weigh 2-4 pounds, take 2-3 minutes to adjust, and don't move once set. They're your "set and forget" solution[3].
If you're hybrid, traveling between home, coffee shops, and client offices (or if you travel frequently), packability is non-negotiable. A stand that folds flat, weighs under 1 pound, and fits into a laptop bag saves the mental overhead of setup decisions on a 14-hour itinerary. Early in my consulting travel, I learned this the hard way: an ultralight stand with sharp edges bruised my shoulder on a rush to a gate-seating area, and a three-minute setup at a lounge bench ate time I didn't have. I started timing setups and weighing kits. Packability became the bellwether metric.
Here's the checklist:
Home/Permanent Workspace:
- Fully adjustable height and tilt.
- Weight: 2-4 lbs (non-portable acceptable).
- Cooling priority: mesh or sled design.
- Setup time: 1-2 minutes, static once placed.
- Estimated daily disruption: ~15 seconds per adjustment.
Hybrid/Travel Workflow:
- Foldable or ultra-compact form factor.
- Weight: under 1 lb (aim for 0.5-0.75 lb).
- Setup time: under 30 seconds, repeatable across locations.
- Rubberized or soft-edge contact (no shoulder bruises).
- Estimated daily disruption: ~45 seconds per location change.
The trade-off is real: ultralight stands often sacrifice tilt precision or cooling. But the mobility ROI (avoiding setup friction across three different desks per week) typically justifies the compromise[2].
Comparative Analysis: Stand Archetypes and Real-World Performance
Stands cluster into a few functional profiles. Here's how they compare against your priorities:
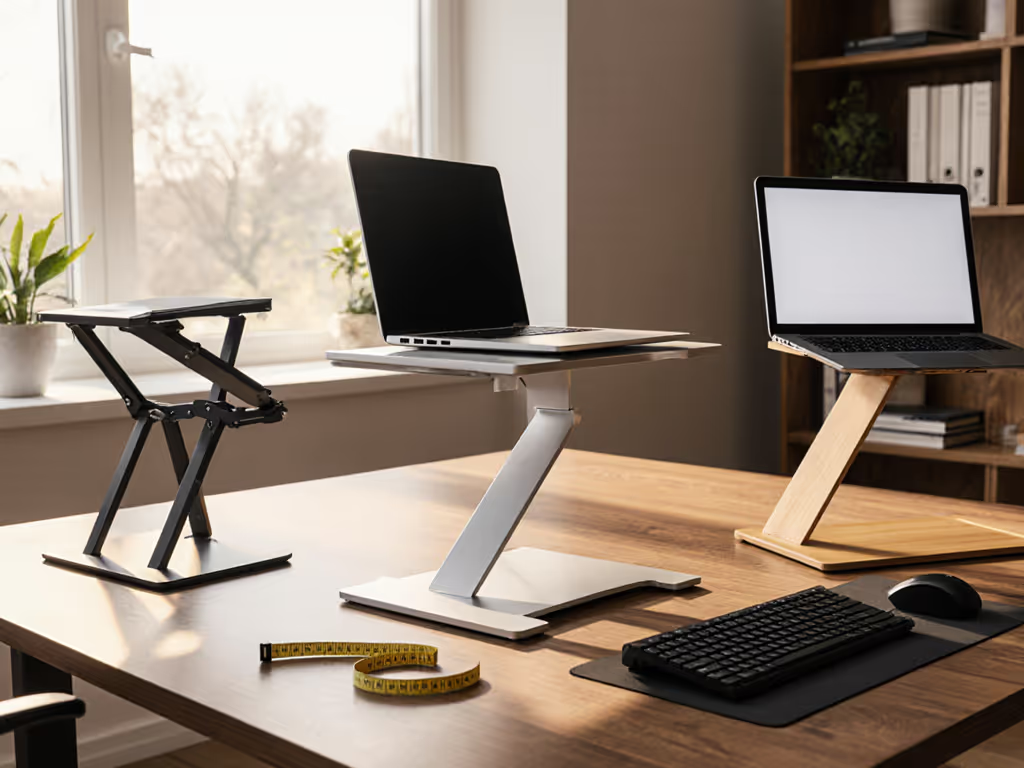
Fixed-Height, Passive Stands (Budget-Friendly Entry Point)
Examples: Tonmon Portable Laptop Stand ($10), iVoler Adjustable Aluminum ($15–$20)[2][3].
Strengths:
- Ultra-compact and foldable; travel-friendly.
- Minimal parts; rarely break.
- Fixed height simplifies decision fatigue for newcomers.
Weaknesses:
- Limited or no tilt adjustment; difficult to achieve eye-level alignment[1].
- Non-adjustable means the stand may not fit your specific height or desk depth.
- Often uncomfortable for sustained typing (requires external keyboard pairing).
Best for: Travelers willing to sacrifice some ergonomic range for minimal bulk, or users with very shallow desks who can't accommodate taller stands.
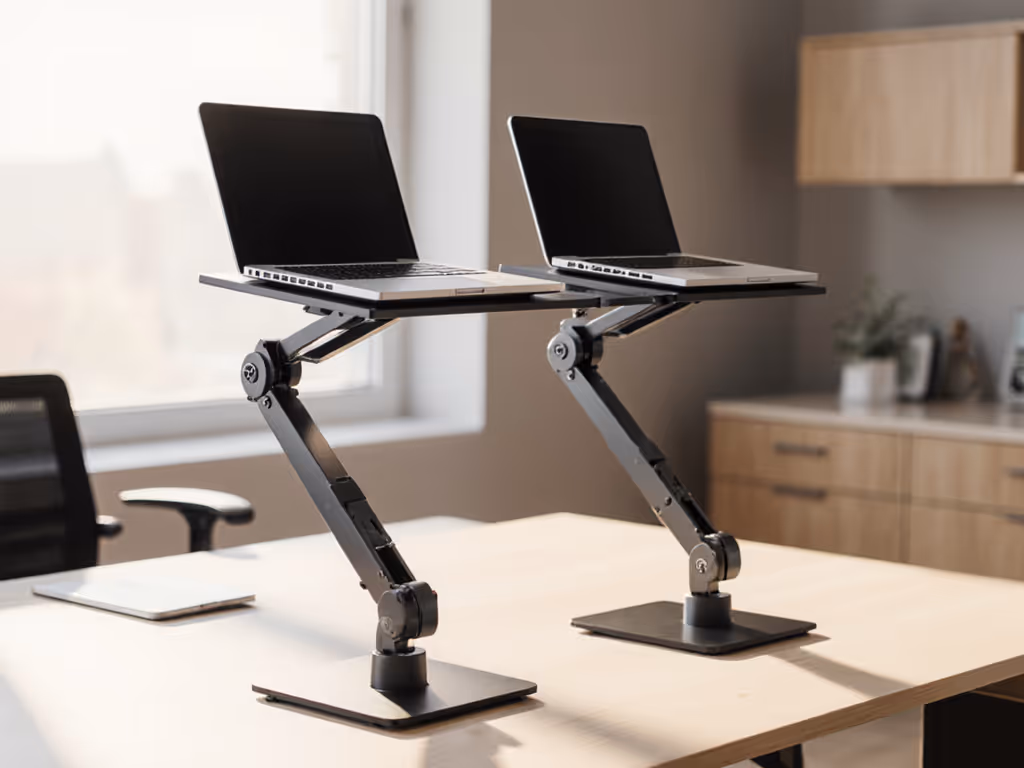
Continuous-Adjustment, Metal-Frame Stands (Professional Workhorse)
Examples: Besign LSX5 Aluminum Laptop Stand ($20), RainDesign mStand, Rain Design mBar pro+ (~$50–$100)[1][3].
Strengths:
- Smooth height and tilt adjustment via smooth arm mechanism or lever control[1].
- Aluminum construction feels premium and durable; excellent heat dissipation[1].
- Supports heavier laptops (15–17") without creep or sag over time.
- Clean aesthetic; integrates well with minimalist desks.
Weaknesses:
- Heavier (2–4 lbs); poor packability for frequent travel.
- Higher price point ($40–$100+).
- Require initial assembly or lever calibration; not instant out-of-the-box.
Best for: Desk-bound professionals and creators who prioritize precision ergonomics and longevity; aesthetics matter; cooling is important.
Modular Workstations (All-in-One Ecosystem)
Examples: Logitech Casa Pop-Up Desk (~$150–$250)[2].
Strengths:
- Bundles stand, keyboard, mouse, and cable management into one integrated case.
- Faster full-workspace setup than assembling separate components; grab-and-go for remote workers.
- Keyboard and mouse quality often exceeds budget peripherals sold separately[2].
- Cable routing built-in; cleaner desk footprint.
Weaknesses:
- High entry cost; you're paying for the bundle even if you already own a keyboard.
- Limited tilt/height customization once assembled (not infinitely adjustable).
- Heavier and less portable than a standalone stand + separate input devices.
- Overkill if you only need to raise your laptop, not rebuild your entire workstation.
Best for: Full remote workers and digital nomads who want a pre-engineered system; those starting from zero desk setup; teams managing multiple devices across locations.
Portable Riser Designs (Compact, Variable Cooling)
Examples: Kentevin Laptop Stand ($15), PWR+ Laptop Table Stand ($45), Soundance Laptop Stand ($25)[1].
Strengths:
- Grooved or stepped height adjustment; no smooth mechanism to loosen.
- Minimal assembly; portable form factor.
- Often include rubber pads to prevent laptop sliding[1].
Weaknesses:
- Discrete height steps mean you can't dial in eye-level precisely; closest-fit compromise required.
- Tilt is often fixed or very limited.
- Plastic bases common; cooling compromised if base sits flush to desk[1].
- Stability can be questionable on uneven surfaces (typical cafe tables).
Best for: Budget-conscious casual users; couch-based work; situations where "good enough" height beats perfect ergonomics; lightweight prioritization.
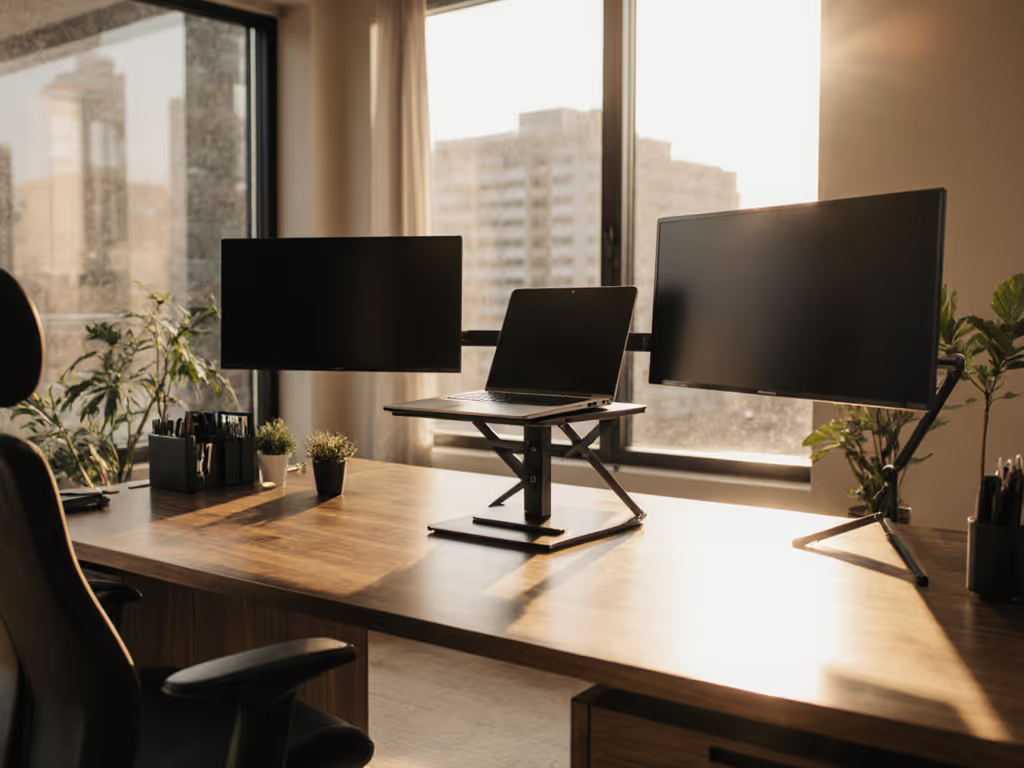
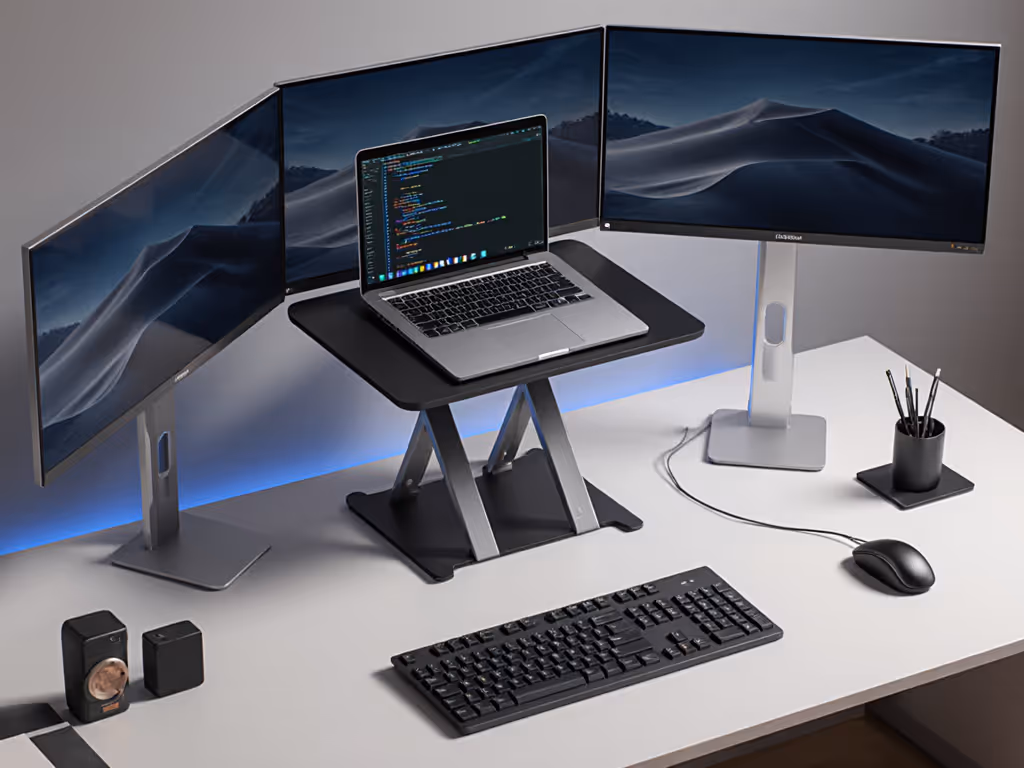
Building Your Multi-Screen Ergonomic System
If you're designing a laptop as primary monitor within a triple monitor workstation, the stand is foundational but not sufficient. Here's how alignment works:
Visual Field Orchestration
With your laptop centered and raised to eye level:
- Primary monitor (laptop): 0° head rotation. Email, code editor, main project.
- Secondary monitor (right): ~25° head rotation. Chat, Slack, reference docs.
- Tertiary monitor (left, optional): ~25° head rotation. Dashboards, real-time data, playback preview.
This symmetry reduces cumulative neck strain compared to one large ultrawide or a laptop flanked by a single monitor[1][3]. The laptop's raised position becomes the pivot point; external monitors align above or at the same height.
Practical Integration Checklist
- Stand height: laptop screen top-third at or 2-3 inches below eye level (seated).
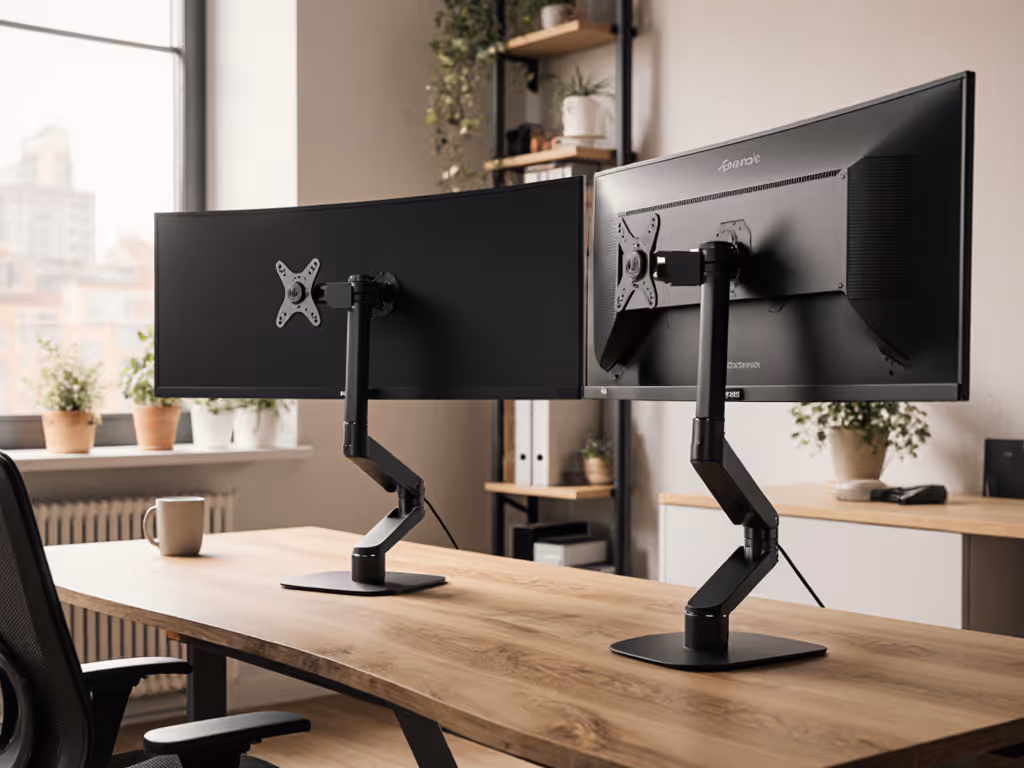
- External monitor mounting: monitor arms or stands position screens at comparable height; avoid the "laptop low, monitors high" trap.
- Keyboard/mouse depth: external keyboard positioned so your elbows stay ~90°; mouse within 1 foot of keyboard[1].
- Cable routing: stands with rear cable slots or clips minimize port obstruction and desk clutter. For a clutter-free desk, follow our cable management tutorial.
- Thermal clearance: at least 2-3 inches of air gap between laptop sides and flanking monitors to prevent heat trapping.
Setup Speed and Call-Readiness: The Professional Presence Factor
Here's where the stand decision truly pays off: your ability to be camera-ready in seconds, not minutes. For on-camera framing and angles, use our eye-level camera guide.
A quality stand with correct height and tilt means:
- Camera angle: your laptop's built-in webcam now points slightly upward (not up-the-nose), improving how you appear on video calls. Professional framing is achieved, not fought for[1].
- Lighting: elevated screen is less likely to be backlit by a window or lamp; you control glare more easily.
- Audio: cleaner sightline lets you maintain eye contact with the screen (and camera) without neck strain; calls feel more present and less exhausted.
- Response time: familiar setup means you can adjust in seconds between locations. No "let me get my stand from the closet" delays.
Pack lighter, set faster, look sharper on every call.
This isn't about aesthetics worship: it is about earned professionalism. When your setup takes three minutes and a wobble ensues, you're distracted. When it takes 30 seconds and feels solid, you can focus on the work, not the equipment.
Call-Readiness Checklist (Repeat Before Every Important Call)
- ☐ Stand is positioned; laptop sits firmly (no wobble when you press the corner).
- ☐ Screen height is neutral (not looking down or up).
- ☐ Keyboard/mouse are in front of you (not tucked under the raised laptop).
- ☐ Background is framed (stand position ideally moves your camera to a clean wall or window).
- ☐ Webcam lens is clean.
- ☐ Cables are routed (no dangling USB or HDMI in frame).
- ☐ Ambient temperature is monitored (if using an intensive app, ensure laptop isn't overheating; cooling stand has done its job).
- Estimated prep time: 45 seconds.
Comparison Matrix: Choosing Your Fit
| Priority | Fixed-Height/Passive | Continuous Adjust | Modular Workstation | Portable Riser |
|---|---|---|---|---|
| Budget | ★★★★★ | ★★★ | ★★ | ★★★★ |
| Ergonomic Range | ★★ | ★★★★★ | ★★★★ | ★★★ |
| Stability | ★★★ | ★★★★★ | ★★★★ | ★★★ |
| Packability | ★★★★★ | ★★ | ★ | ★★★★ |
| Cooling | ★★★ | ★★★★★ | ★★★ | ★★ |
| Setup Speed | ★★★★ | ★★★ | ★★★★★ | ★★★★ |
| Aesthetic | ★★★ | ★★★★★ | ★★★★ | ★★★ |
| Multi-Screen Ready | ★★★ | ★★★★★ | ★★★★ | ★★★ |
Note: Ratings reflect typical options in each category; individual models may exceed or fall short of these benchmarks.
Risk-Reduction Tips: Avoiding Costly Mistakes
- Verify weight rating before purchase. Don't assume "laptop stand" means it supports your 17" MacBook Pro. Most budget stands top out at 13–15" devices.
- Check return policies. Ergonomics are personal; your perfect stand might feel wrong for someone else. Buy from retailers with hassle-free returns.
- Test stability on your actual desk surface. Stands behave differently on bamboo, laminate, or standing desks with slight slopes. Demo if possible.
- Pair immediately with an external keyboard. A raised laptop without a separate keyboard is just a different posture problem. Plan the full system upfront.
- Account for heat in your choice. If you run heavy workloads (video editing, rendering, machine learning), prioritize open-frame or mesh designs; dense plastic stands risk thermal throttling.
- Measure your eye level to your desk surface. It varies by chair height, posture, and individual proportions. Don't rely on generic "6-8 inches" estimates.
Looking Ahead: Future-Proofing Your Choice
Think beyond your current setup. Will your next laptop be larger or smaller? Might you shift from hybrid to fully remote, or vice versa? Do you plan to add external monitors later?
Continuous-adjustment metal stands ($40-80) adapt to these changes better than fixed-height or discrete-step designs. The initial investment pays dividends across multiple device upgrades and workflow shifts.
Modular workstations lock you into a specific keyboard and mouse; upgrading one component means replacing the whole bundle. Useful if you love everything; limiting if you want flexibility.
Portable designs remain your travel safety net even after you've upgraded your home setup. A sub-1 lb backup stand costs little and serves every hotel desk, coffee shop, and airport lounge indefinitely.
Implementation Path: From Analysis to Action
- Identify your archetype: Are you home-based, hybrid, or nomadic? Does packability or ergonomic precision matter more?
- Measure your fit window: Desk height, chair height, arm length, and laptop size. Match these to stand specifications (not marketing images).
- Prioritize your pain point: Is wobble breaking focus? Is heat throttling your performance? Is setup time eating into your day? Choose the stand profile that solves your biggest friction.
- Pair with peripherals: Select an external keyboard and mouse that match your stand's height. Test the full system before committing.
- Set a 30-day checkpoint: After a month of daily use, revisit your posture, energy levels, and video-call presence. Tweak if needed; return if it's not working.
The goal isn't perfection: it is measurable improvement. A stand that reduces your neck strain by even 20%, cuts your setup time from five minutes to 30 seconds, or improves your on-camera presence is worth the investment. The framework above gives you the language and data to choose with confidence, not hope.
Your workspace should work as hard as you do. Start with the stand that fits your body and rhythm, pair it with intentional desk layout, and build from there. Small details (height precision, thermal clearance, cable routing) cascade into daily gains in comfort, focus, and professional presence.
Related Articles