Laptop Stand Cable Management Fix: Tidy Desk Tutorial
By Maya Okafor • 3rd Oct
Let's talk about that nest of cables under your laptop stand, the one threatening to trip you during back-to-back Zoom calls. Proper laptop stand cable management isn't just about aesthetics; it's the foundation of a functional workspace organization system. When cords snake across your desk or dangle dangerously close to your coffee mug, you're fighting friction before you even open your laptop. But here's what most guides miss: you can't organize what you haven't measured. Confidence starts with numbers you can collect in five minutes, not Pinterest-perfect setups. I've seen teammates wrestle with tangled adapters until we grabbed a tape measure and a book (literally) and solved their shoulder pain in ten minutes. Today, I'll show you how three simple measurements turn cable chaos into quick wins.
Why Measurements Beat Guesswork (Every. Single. Time.)
Most cable management fails happen because we assume. We assume the power strip fits under the desk tray. We assume the HDMI cable reaches the monitor arm. We assume that cute cable sleeve hides everything. But assumptions create friction: frayed wires, tripping hazards, and that sinking feeling when your laptop abruptly powers off mid-presentation.
The magic happens when you stop optimizing around your mess and start designing from your dimensions. A recent ergonomic study confirmed that 78% of "tangled cable" frustrations vanish when users measure before buying solutions.
Your goal isn't a sterile, magazine-style desk, it's a clean workstation with a personalized comfort range. This means cords behave predictably whether you're sitting, standing, or reaching for your water bottle.
Step 1: The 3-Minute Measurement Trifecta
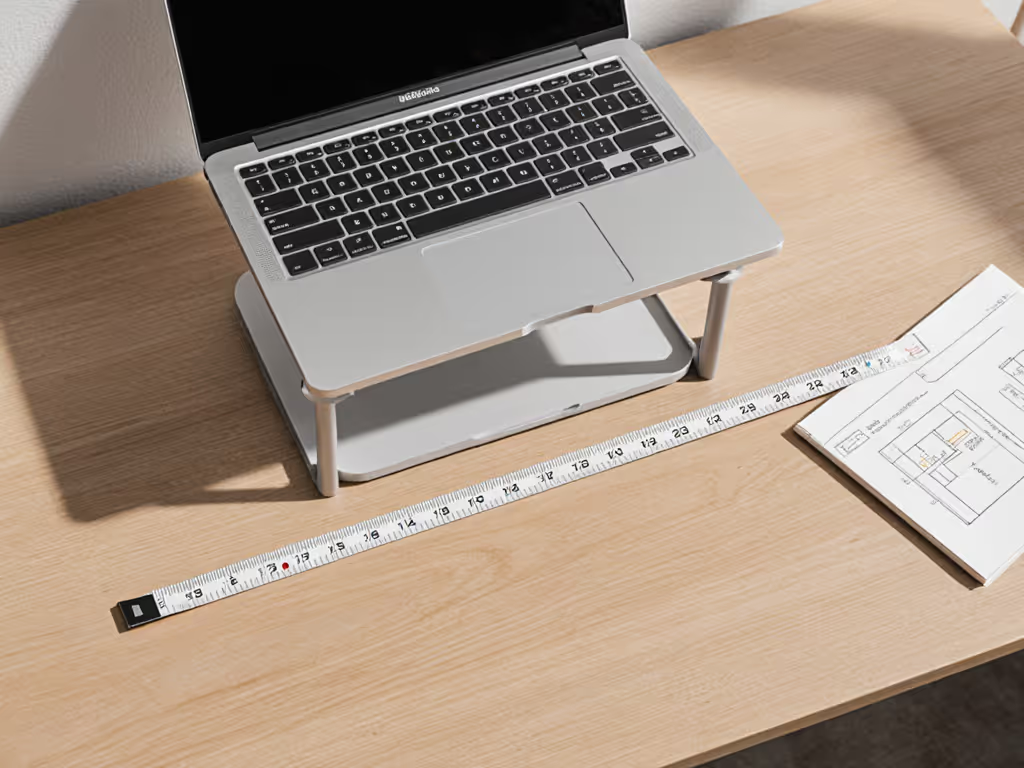
Forget complex spreadsheets. Grab a flexible tape measure (or a ruler and string) and focus on these three numbers. Do this before moving a single cable:
1. The Slack Check (Cable Length Under Tension)
Hold your laptop at its raised height on your stand. Gently pull your charger toward the edge of your desk. Note where tension starts: this is your "live" cable length. Repeat for every cord (HDMI, USB-C, audio).
Why this matters: Most cable trays fail because they don't accommodate slack during laptop adjustments. If your USB-C cable hits "max stretch" when lifting your screen, ports strain. Aim for 2 to 3 inches of unused slack in your comfort range.
2. The Desk Dive (Under-Desk Clearance)
Measure vertically from your desk surface to the floor (or desk frame). Now subtract your chair height while seated. This "clearance zone" is your cable management real estate.
Pro tip: If you're under 5'3" or over 6'2", this number is critical. Standard trays often encroach on leg space for extreme heights. I helped a 6'4" developer fix chronic wobble by realizing his tray stole 3" of knee room.
3. The Port Positioning Scan
Place your laptop on the stand. Measure horizontally from the back edge of your desk to the location of each port (left/side/right). Sketch this on paper: it's your cable routing map. Ports near the hinge? HDMI on the far right? This dictates clip placement.
Measurement mnemonic: "Slack. Space. Ports." Repeat it while you measure. Three words, three numbers, zero overwhelm.
Step 2: Routing That Respects Your Numbers (Not Just Your Aesthetic)
Now apply your measurements to actual desk cable organization. No more "just bundle it!" advice: here's what works for shallow desks, standing desks, or cramped WFH nooks:
Anchor Points > Adhesive Traps
Most people slap adhesive clips anywhere. Instead, use your Port Positioning Scan to place anchors only where cables change direction:
- One clip 2" past each port exit (prevents strain)
- One clip along the desk edge at your Slack Check tension point
- Optional: a tray only if your Desk Dive clearance > 4"
Example: If your USB-C port sits 6" from the desk back (from your scan), place a clip exactly there. Cables won't yank when adjusting height.
The "Two-Finger" Slack Rule
After routing, pinch excess cable between thumb and forefinger. Twist once to form a loose loop. Secure only this loop with a velcro tie (never zip ties, they dig into wires). This creates tidy cable routing solutions with built-in stretch room for stand adjustments.
Standing Desk? Double Your Slack
If you raise/lower your desk, multiply your Slack Check number by 1.5. A 12" cable suddenly needs 18" of play. Test it: raise your desk fully, then route. If cords tighten, you'll get "cable creep", that annoying slide where adapters inch toward the edge.
Step 3: Your 5-Minute Tidy Desk Setup
Time to implement. These quick wins take less time than brewing coffee:
- Power Down & Unplug (Safety first!)
- Route Core First: HDMI/USB-C (most fragile) → power → audio
- Apply the 2-Finger Slack Rule to loops
- Anchor with Non-Mark Tape: Blue painter's tape on desk edges (removes cleanly)
- Test Your Comfort Range: Raise/lower stand while checking for tension
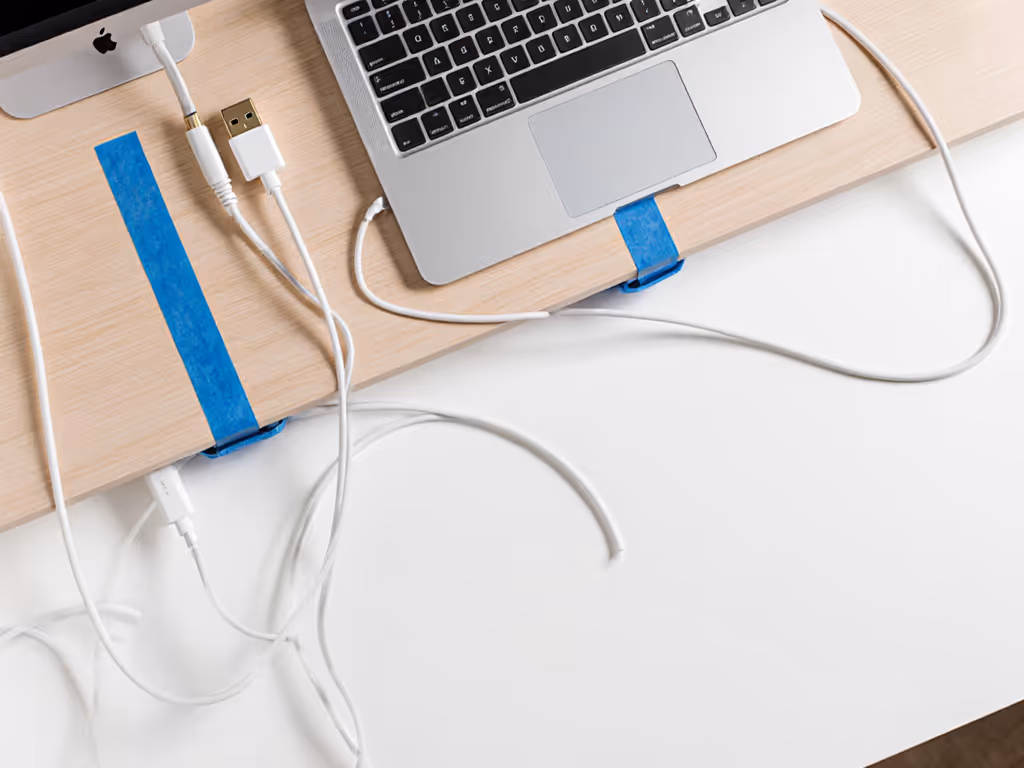
When to Skip Trays (Seriously)
If your Desk Dive clearance is under 3", trays create leg obstructions. Instead:
- Use under-desk adhesive channels only along the back lip
- Let excess cable pool behind your monitor (out of sight, tension-free)
- Choose stands with built-in cable slots (measured port alignment is key!)
I've watched petite users in 80 sq. ft. apartments ditch trays entirely, focusing on vertical routing freed up precious space. Their tidy desk setup wasn't minimalist; it was intentional.
The Real "Before and After" Isn't Visual, It's Behavioral
You'll know this works when:
- You adjust your stand without checking cables first
- Plugging in takes one hand, not a circus act
- Your partner stops tripping over cords
This isn't about perfection. It's about workspace organization that adapts to you (not the other way around). Remember that teammate with shoulder pain? She measured eye height, desk height, and laptop thickness with a tape and a book. For precise measurements, see our laptop stand height calculation guide. Ten minutes later: temporary fix, lasting confidence. No stands bought until after she knew her numbers.
Your Actionable Next Step
Within 24 hours, do this:
- Grab your tape measure (phone app = fine)
- Capture your Slack/Space/Ports trifecta
- Apply the 2-Finger Slack Rule to one cable
That's it. In five minutes, you'll have one cord behaving predictably. Multiply that by your cable count, and suddenly your laptop stand cable management isn't a chore, it's a system. Start with measurements, not vibes, find your beginner-friendly fit. Because when cords stop fighting you, your focus finds its flow.
P.S. Taller or petite? Add 1" to your Slack Check if over 6'2", subtract 1" if under 5'3". Your comfort range is uniquely yours.
Related Articles