Tall Monitor Stands: Laptop vs. Traditional
By Aisha Chen • 28th Apr

If you're spending 4+ hours a day on a 15-inch laptop screen at desk height, your neck is already negotiating with your spine. The choice between a tall monitor ergonomics setup built around a traditional stand versus a laptop-centric riser isn't just about inches, it's about whether you're solving for one itinerary or building a system that moves with you. Large display workstation thinking typically assumes a fixed desk; laptop-stand thinking assumes mobility, shallow desks, and frequent environment changes. This guide walks through the trade-offs with real measurements, setup timelines, and the specific scenarios where each approach actually wins. For a full setup blueprint, see our complete ergonomic workstation guide.
The Core Difference: Mobility vs. Permanence
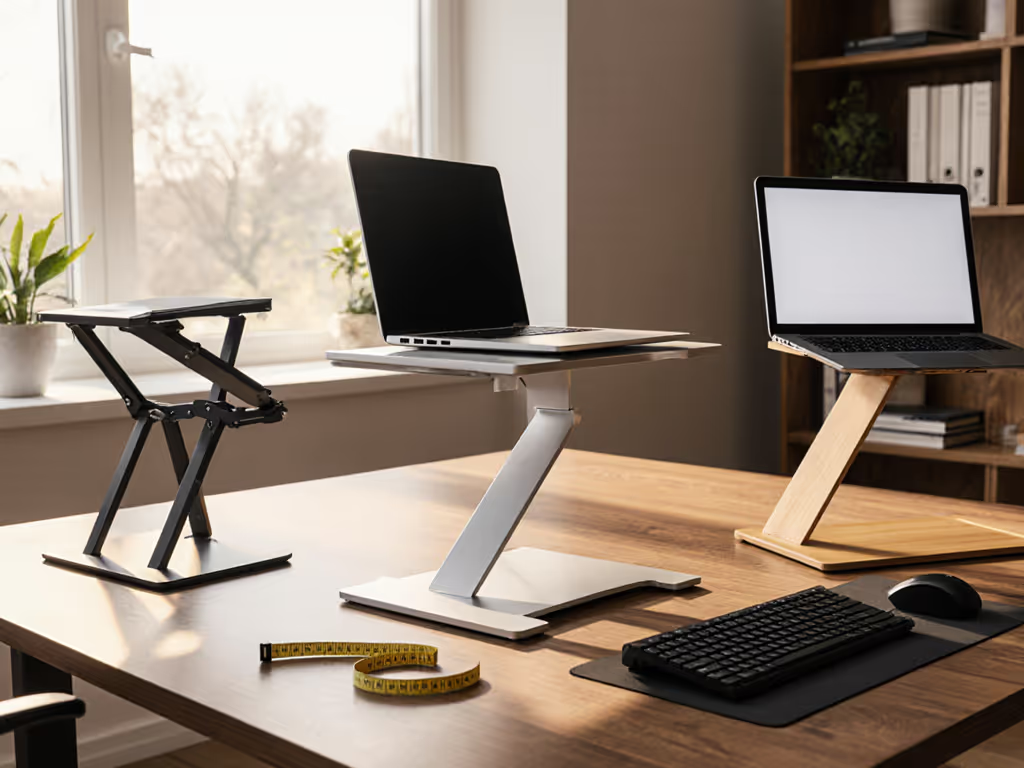
A traditional monitor stand (the kind rated for 22-38 inch displays up to 35 lbs) is built for anchoring. It sits, it stays, and it holds. A laptop stand is built for transition. That philosophical difference cascades through every spec.
Traditional tall stands (often called 32-inch monitor stand solutions or ultrawide display positioning mounts) typically weigh 3-8 lbs, fold to roughly 8" × 12" × 2", and deploy in 90-180 seconds. They clamp or grommet to your desk, and once set, they don't move until you're packing up. A quality traditional stand like the VIVO Tall Single Monitor Desk Mount can hold up to 22 lbs and adjust from roughly 6" to 21" of height, giving you a broad monitor height calibration range for people between 5'2" and 6'4".
Laptop stands, by contrast, are optimized for fold-flat packability and sub-30-second setup. Many collapse into briefcase-width profiles and weigh under 2 lbs. The trade-off: they sacrifice adjustability. Most laptop stands offer 4-6 height positions instead of infinite adjustment, and they don't elevate as high (typically 4 to 7 inches of lift) because the laptop itself contributes screen height.
Pack lighter, set faster, look sharper on every call, but only if the stand actually suits your height and desk depth.
The Ergonomic Math: Eye Level, Neck Angle, Wrist Position
Both approaches claim "ergonomic alignment," but the math differs based on what screen you're elevating.
A large display workstation with a 27-32 inch external monitor mounted on a tall traditional stand can lift that screen to true eye level for most users (roughly 15-22 inches above desk surface for seated work). This puts the top of the screen at or just below eye level, which is the sweet spot for reducing cervical spine load. Studies benchmarking posture over 8-hour workdays show that screen heights more than 4 inches below eye level correlate with measurable neck extension and trapezius tension. Dial it in with our eye-level height calculator.
A laptop stand raises your laptop screen 4-7 inches, which for a 13-15 inch laptop gets you closer to eye level, but rarely all the way there, especially if you're taller than 5'11". The math: a 13-inch MacBook with a 1-inch bezel sits about 9 inches from hinge to top of display. Raise it 5 inches, and you've got the top of the screen at roughly 14 inches above desk surface. For someone 6 feet tall, that's still 6-8 degrees of downward gaze, which is better than flat-on-the-desk (15-20 degrees down), but not optimal.
The wrist story flips the equation. On a tall traditional stand, your keyboard and mouse sit below the screen, typically requiring an external keyboard/mouse setup to achieve neutral wrist extension. On a laptop stand, the keyboard is part of the device, so your wrist angle depends on the stand's tilt. A stand that tilts the laptop back 10-15 degrees (typical for good models) reduces wrist extension compared to closed-laptop typing, but doesn't eliminate it. If you're a data analyst or coder logging 6+ hours of typing daily, this matters, a traditional monitor stand with a separate ergonomic keyboard (like a split or curved design) outperforms a laptop stand for wrist health over time. For step-by-step relief, follow our wrist pain setup guide.
High-Resolution Screen Ergonomics and Display Quality
Traditional stands almost always pair with an external monitor (4K, IPS, or ultrawide) giving you 110-180 PPI pixel density. Laptop screens max out around 220 PPI on premium models, but most 13-15 inch units sit at 100-150 PPI. For detail work (video editing, CAD, design proofs), the external monitor wins. For text and spreadsheets, both are fine; the difference is in how long your eyes stay comfortable.
Larger screens (27"+ at traditional viewing distance of 24-28 inches) let you scale text and UI elements without aggressive zoom, reducing eye fatigue and accommodating people with presbyopia or mild vision corrections. Laptop screens force either aggressive zoom (which shrinks workspace) or smaller interface elements (which demand closer focus, increasing accommodation stress).
Another detail: traditional stands often position the monitor slightly further back on your desk, giving you more viewing distance and less eye-tracking load. A laptop stand puts the screen closer, increasing accommodation demand for long stretches.
Setup Speed and Deployment in Real Workflows
This is where Aisha's core insight crystallizes: setup speed is a silent tax on your day, and a tax on your presence on calls.
Airport bench test: you have 12 minutes before a video call. Laptop stand takes 15 seconds to unfold, position, and clamp (if it's a portable clamp model). You're ready to adjust camera angle, test audio, and sit in a call-ready posture. A traditional stand? You need a flat, sturdy surface (not a wobbly airport bench), you need to clamp or screw it down, you need cable routing, and you need to boot an external keyboard, that's 4-6 minutes. For hybrid work or frequent location changes, laptop stands win decisively.
Home-office scenario: you're not moving it for weeks. Setup speed stops mattering after week one. A traditional stand's broader adjustment range and stability over time become the value proposition.
Here's the checklist that separates the two:
- Laptop stand: Unfold (10 sec) → Position (10 sec) → Adjust height (5 sec) → Ready (25 sec total). Repeat this 5 times daily in different locations? That's ~3.5 minutes saved over a traditional setup.
- Traditional stand: Unpack (20 sec) → Clear desk space (30 sec) → Clamp or screw (60-90 sec) → Route cables (30 sec) → Boot external keyboard (20 sec) → Adjust height and tilt (30 sec) → Ready (3-4 minutes total).
For someone on a 14-hour itinerary with 4 location changes, that's 10+ minutes recovered, time you didn't know you had.
Stability Under Load: Wobble, Sag, and Creep
One of the most common pain points: a stand that feels solid on day one but creeps or sags by month three, or wobbles when you're typing intensely.
Traditional stands designed for larger monitors (like the monTEK Tall Single Monitor Arm, rated for 35 lbs and curved screens up to 45 inches) use heavier-gauge steel or aluminum and are bolted to your desk via c-clamp or grommet. The mechanical advantage is fixed. Wobble risk is low if the clamp is tight, and sag risk is virtually zero because the weight is distributed across a fixed base.
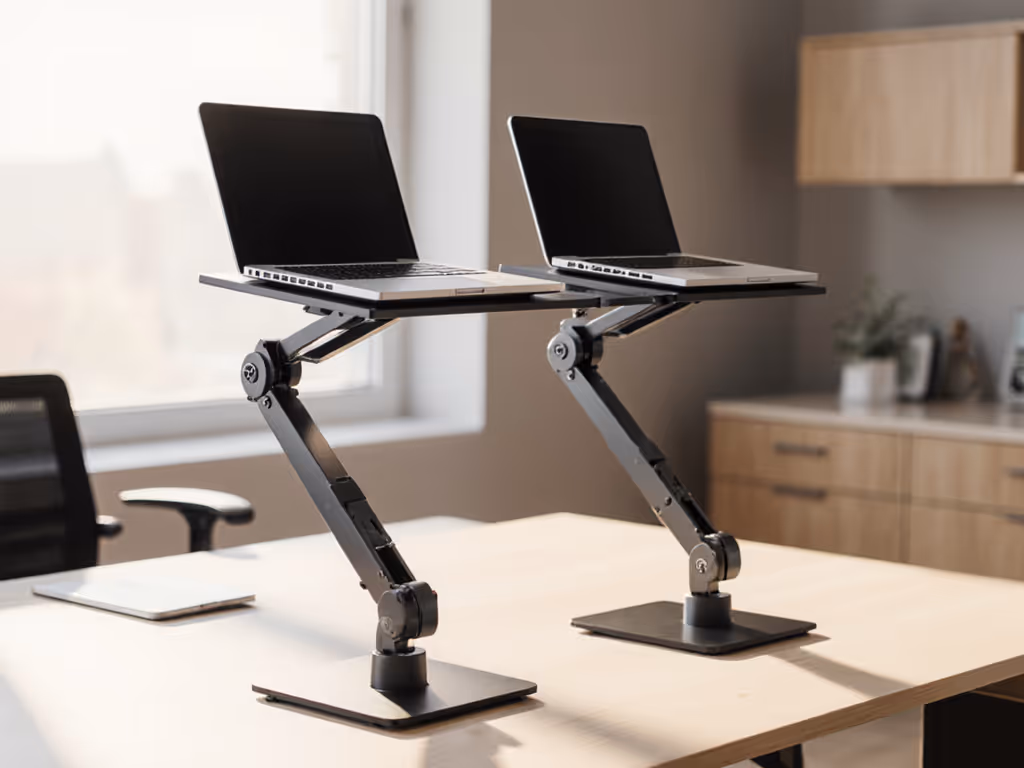
Laptop stands are more vulnerable because they're lighter and the device is cantilevered. A 17-inch MacBook Pro (5.2 lbs) on a flimsy stand creates moment arm stress; a 13-inch device (3.4 lbs) on the same stand feels stable. Heavy laptops (gaming rigs, workstation laptops) benefit from stands with a weighted base or friction-locking hinges. Cheap laptop stands with sliding plastic joints creep after 100+ open-close cycles; quality models use ball-bearing or positive-lock hinges that hold position indefinitely.
Stability also affects thermal performance: a stand that wobbles or has air gaps prevents consistent airflow under the device, trapping heat. A rock-solid stand keeps the laptop at a consistent angle and height, ensuring predictable cooling.
Portability and Packability Scoring
This is Aisha's home turf. Real-world packability is measured in three dimensions:
-
Volume when folded: Laptop stands typically collapse to 8 to 12 inches × 6 to 8 inches × 1 to 2 inches, fitting into a laptop bag or backpack side pocket. Traditional stands rarely fold that flat; they're designed to live on a desk. If you're traveling 2+ days per week, this matters immensely.
-
Weight: Portable laptop stands range from 0.8 lbs (aluminum, minimalist design) to 3 lbs (steel, adjustable). Traditional stands start at 3-4 lbs for single-monitor models and go up to 8 lbs for dual-monitor rigs. For frequent travelers or people with shoulder/wrist issues, every ounce counts.
-
Setup components: Laptop stands are usually one piece. Traditional stands require cables, external keyboard, external mouse, and sometimes a monitor arm. That's 4-6 items in your bag instead of 1.
Packability scoring for a 5-day hybrid week: Laptop stand (0.8 lbs, 10" × 7" × 1.5") wins. For a permanent home office, traditional stand (6 lbs, but optimized for one location) frees you from micro-management.
Thermal Performance and Acoustic Footprint
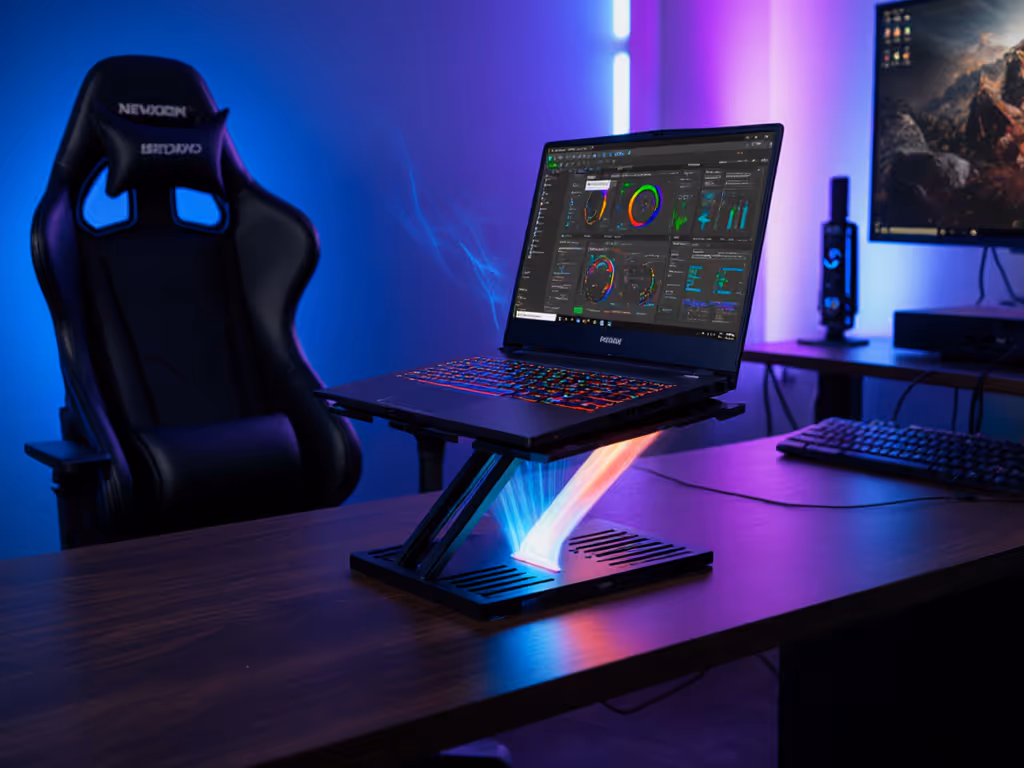
Raising your laptop improves airflow underneath, if the stand design allows it. A solid platform (like some laptop riser stands) blocks airflow more than a frame-based design with open sides and an angled base.
Laptop CPUs thermal-throttle when sustained, causing performance drops and fan spin-up. Understand the why with our laptop cooling thermodynamics explainer. During video calls or light tasks, this is rarely an issue; during rendering, compilation, or data processing, it matters. Quality laptop stands lift high enough (5-7 inches) and are open enough underneath (frame, not solid base) to drop CPU temperatures by 5-15°F compared to flat-desk typing. Traditional monitor setups decouple the laptop entirely, so you can position it on a separate cooling pad or stand if needed, giving you finer thermal control.
Camera Angle and Video Call Presence
Both setups affect how you appear on calls. Get quick eye-level camera tips for cleaner video calls. A laptop stand that tilts the laptop back 10-15 degrees aims the camera upward, which is closer to eye level for your call partner. A laptop sitting flat or slightly forward aims the camera down (the notorious "up the nose" angle). Traditional setups with an external monitor put that monitor at eye level, but your camera (if it's in the monitor bezel or on a separate USB camera) also sits higher.
Compatibility and Desk Fit
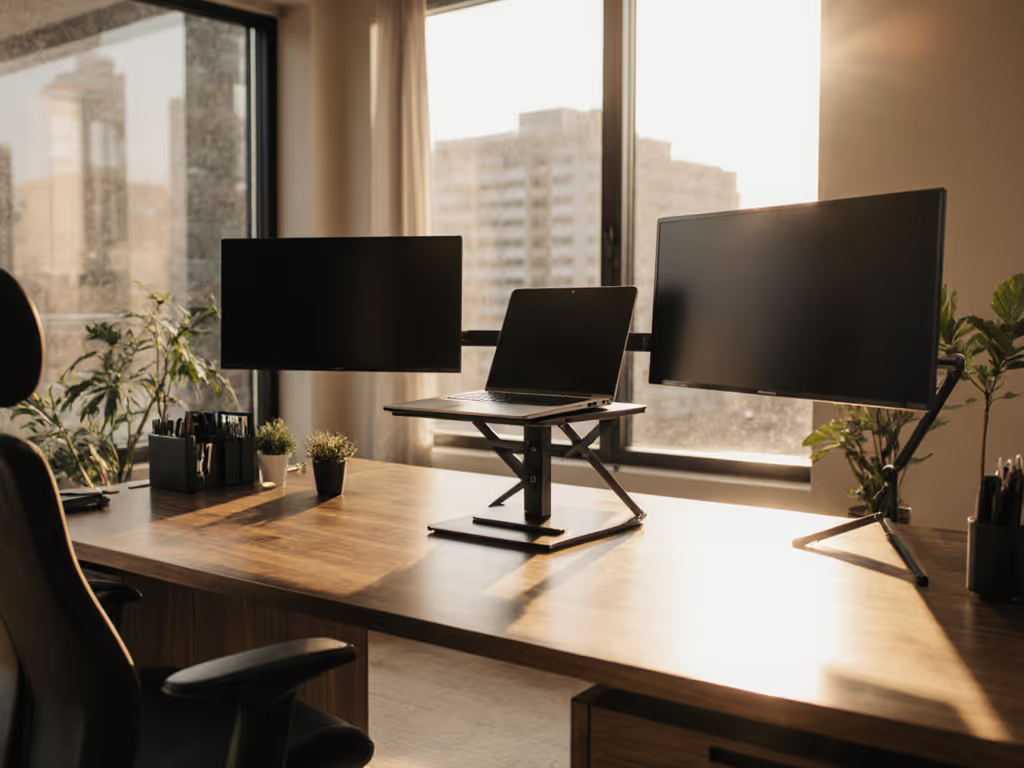
Ultrawide display positioning and large monitor stands assume a desk with at least 30 inches of depth and 36+ inches of width. A shallow desk (20" deep) may not accommodate a clamped stand without blocking your lap or forcing the monitor too close.
Laptop stands are more forgiving on shallow desks and small apartments because they occupy minimal footprint. The trade-off: a narrow adjustment range might not fit your height or preferred ergonomic angle.
Before choosing, measure your desk (depth, width, thickness if clamping) and your ideal screen height based on your seated eye level.
When to Choose Each
Choose a traditional tall stand if:
- You work 80%+ from a fixed desk.
- You're 5'10" or taller and need true eye-level screen positioning.
- You're typing 6+ hours daily and want an external ergonomic keyboard.
- You have heavy monitoring/multi-screen workflows (and you're already considering a second monitor).
- You want rock-solid stability and long-term durability without adjustment.
Choose a laptop stand if:
- You're hybrid, remote, or travel weekly.
- You value sub-30-second setup and fold-flat packability.
- Your desk is shallow or you work in small spaces.
- You're 5'2" to 5'10" and adequate screen lift works for your frame.
- You want a single, lightweight solution without peripheral gear.
The Hybrid Path: Best of Both Worlds
Many optimizers use a hybrid approach: a high-quality laptop stand at home (faster setup for daily standups, calls, and shallow-desk work) and a portable ultra-lightweight stand (0.8-1.5 lbs) for travel or coffee-shop work. This splits the difference, you invest in one solid setup for home and one featherweight solution for mobility.
For remote workers moving between home and multiple client offices weekly, the hybrid approach pays for itself in agility and consistency.
Final Calibration: Measurement-Driven Choice
Avoid guesswork: measure your height, desk depth, and typical sitting eye level before buying. If you're taller than 6'2" or shorter than 5'2", don't assume "universal" ranges work for you, check the adjustment specs.
Test both a laptop stand and a traditional stand in your environment, if possible. Many retailers (like Best Buy) have tall monitor risers and stands on display; a 5-minute trial beats weeks of returns.
The right tall monitor setup isn't the most expensive or the most compact, it's the one that fits your height, desk, workflow frequency, and ergonomic non-negotiables. Measure twice, buy once, and pack lighter on every move forward.